 USA
USA
 Canada
 Australia
 UK
UK Europe
 New Zealand
 Japan
Japan Singapore
 UAE
UAE India
India


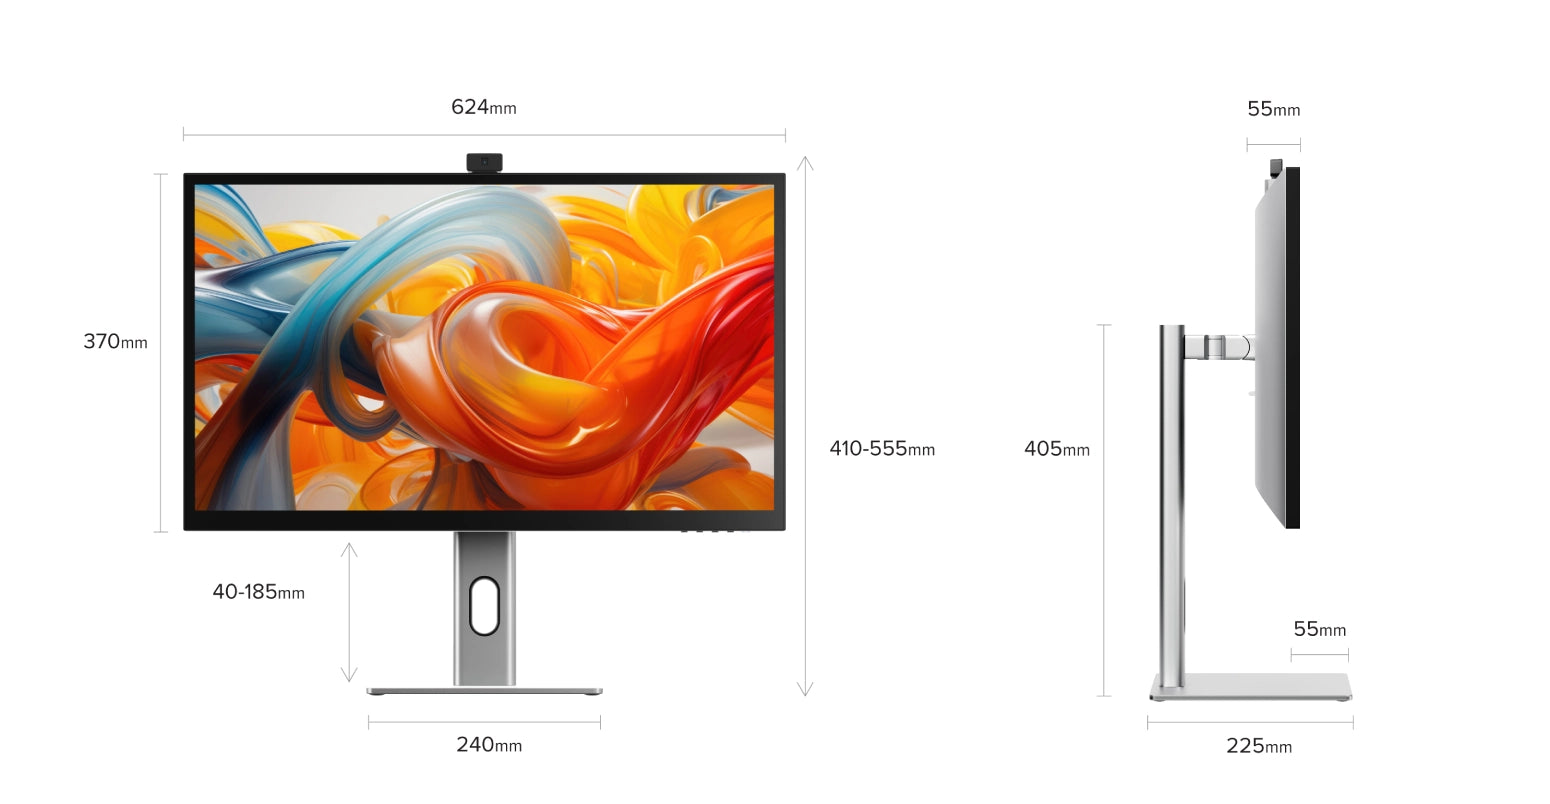
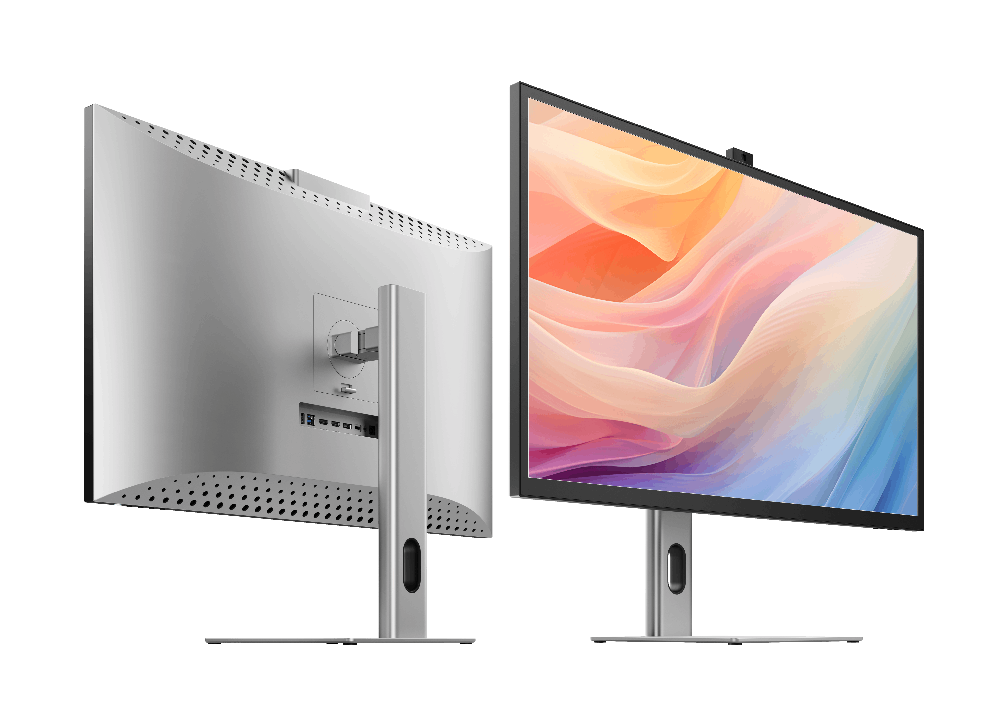
Clarity Pro Touch 27" UHD 4K Monitor with 65W PD, Webcam and Touchscreen

“Alogic Clarity Pro Touch Display – Best touchscreen display for Mac”
"This versatile 27in 4K touchscreen monitor, with a built-in webcam and 65W power delivery, is perfect for creative professionals."
"Alogic’s Clarity Pro Is An Affordable Alternative To Apple’s Studio Display"

The Best Monitors for Photo Editing in 2024
“Alogic's New Clarity Pro Displays Include a Retractable Webcam and Optional Touchscreen Functionality”
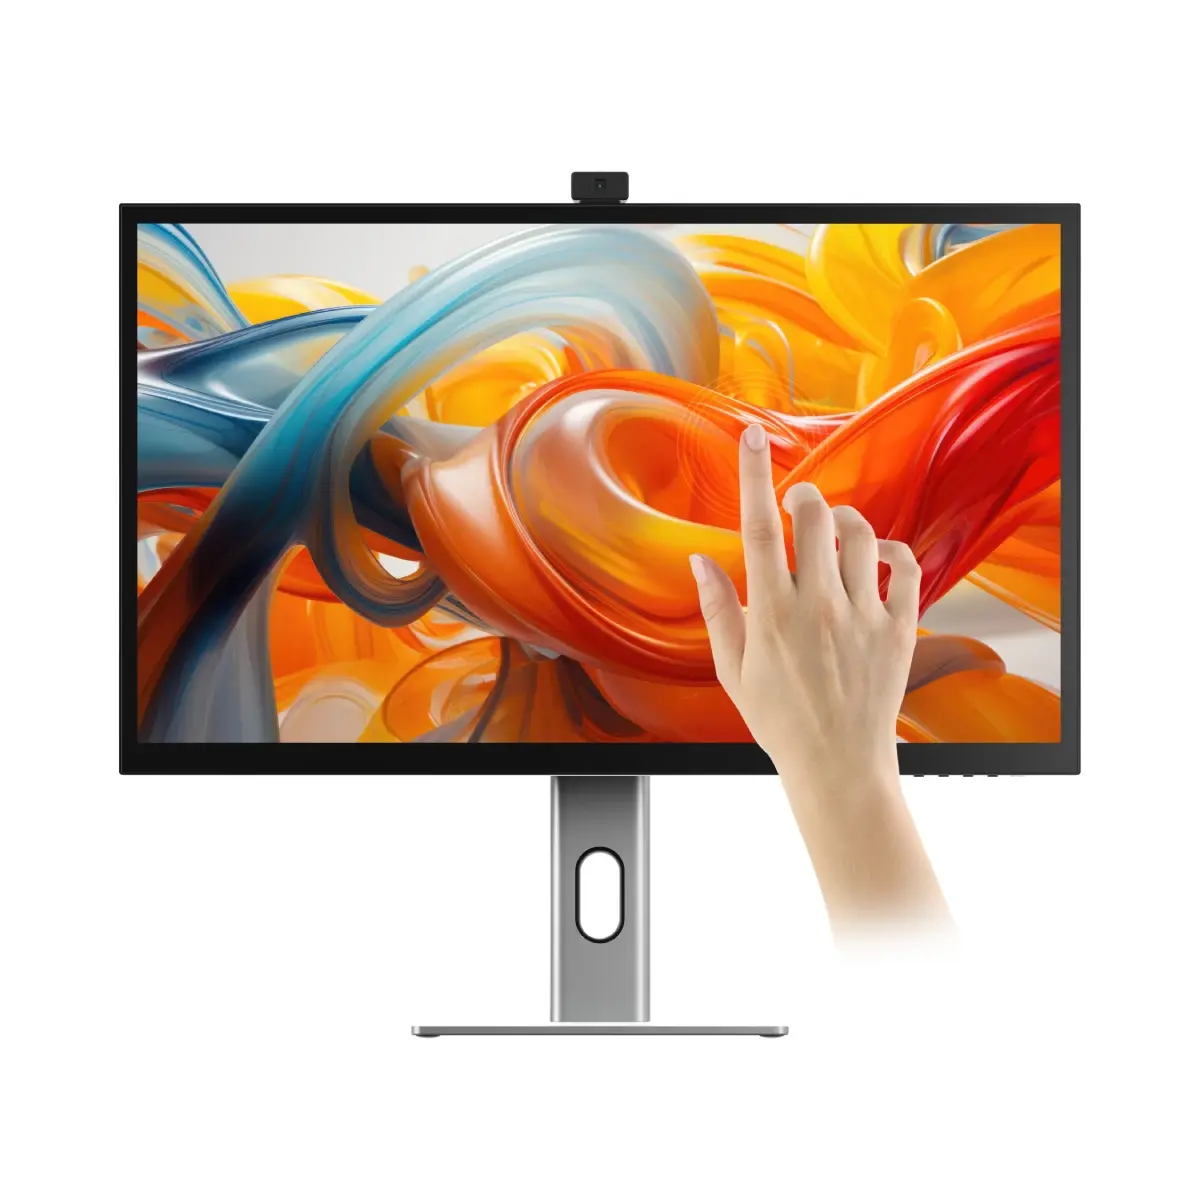
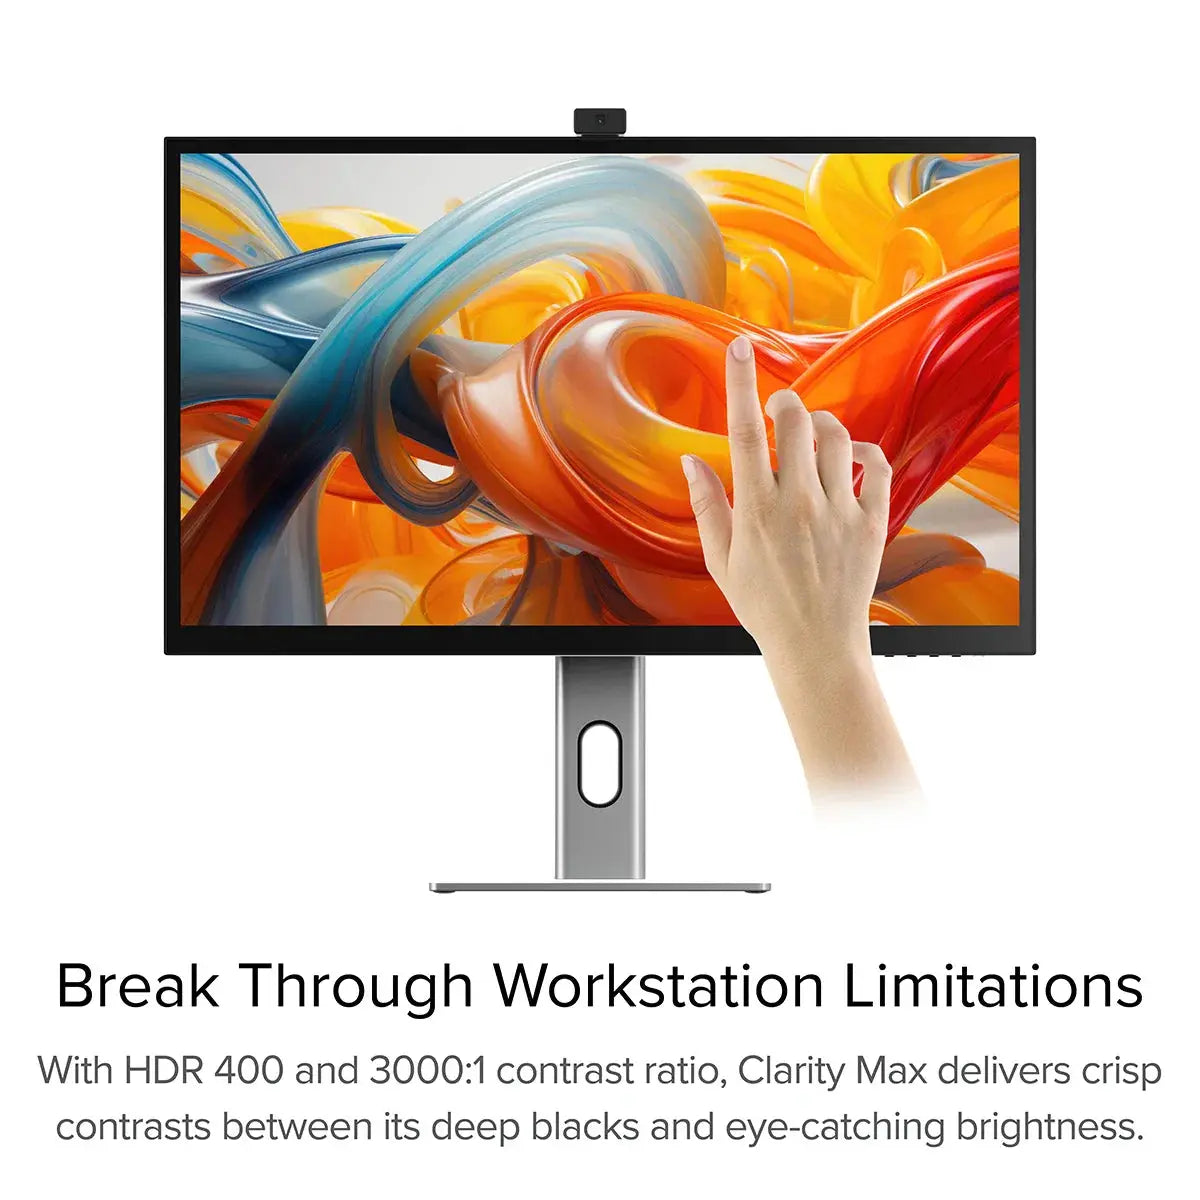
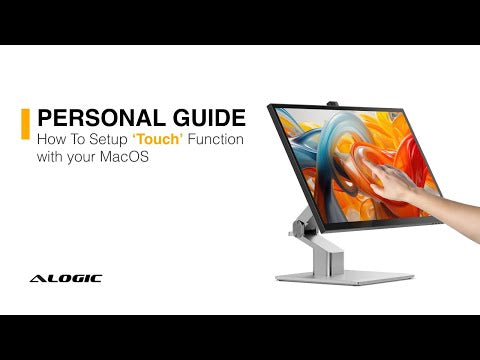
Clarity Pro Touch’s precision 10-point touchscreen lets you get hands on with your work.

Clarity Pro Touch lets you unleash your creativity in whole new ways using your fingers or a capacitive stylus.

Navigate your digital canvasses with using all the intuitive touch gestures you’re used to from your phone and tablet*.

With an ultra-thin One Glass Solution touchscreen that can track ten points of touch at once, you’ve never felt closer to your work.
Clarity Pro is an exceptional display for digital artists who require absolute confidence in their work. This studio-quality, 27” 4K display presents your work in perfect colour, while its retractable 8MP webcam ensures you’re always looking your best. Its rear USB hub lets you declutter your studio and connect to your entire workstation with a single cable, leaving all your focus on what truly matters: your next masterpiece.

Refine your compositions in a more intuitive way, using your fingers or a stylus to quickly find the perfect levels in Lightroom or navigate your extensive library.

Interact with your music in a whole new way using Clarity Pro Touch’s 10-input precision touchscreen. Fine-tune virtual instruments, play around with your morphs and discover new sounds in DAWs such as Pro Tools or Ableton Live.

Bring your ideas to life with Clarity Pro Touch’s precision touch screen. Use your fingers or a pressure-sensitive stylus to interact with programs like Adobe Photoshop, Illustrator or SketchUp in a whole new way.
Quick and easy shortcuts, like swiping Clarity’s lower right corner with two fingers to access its touch menu, can completely change the way your navigate your favourite apps.
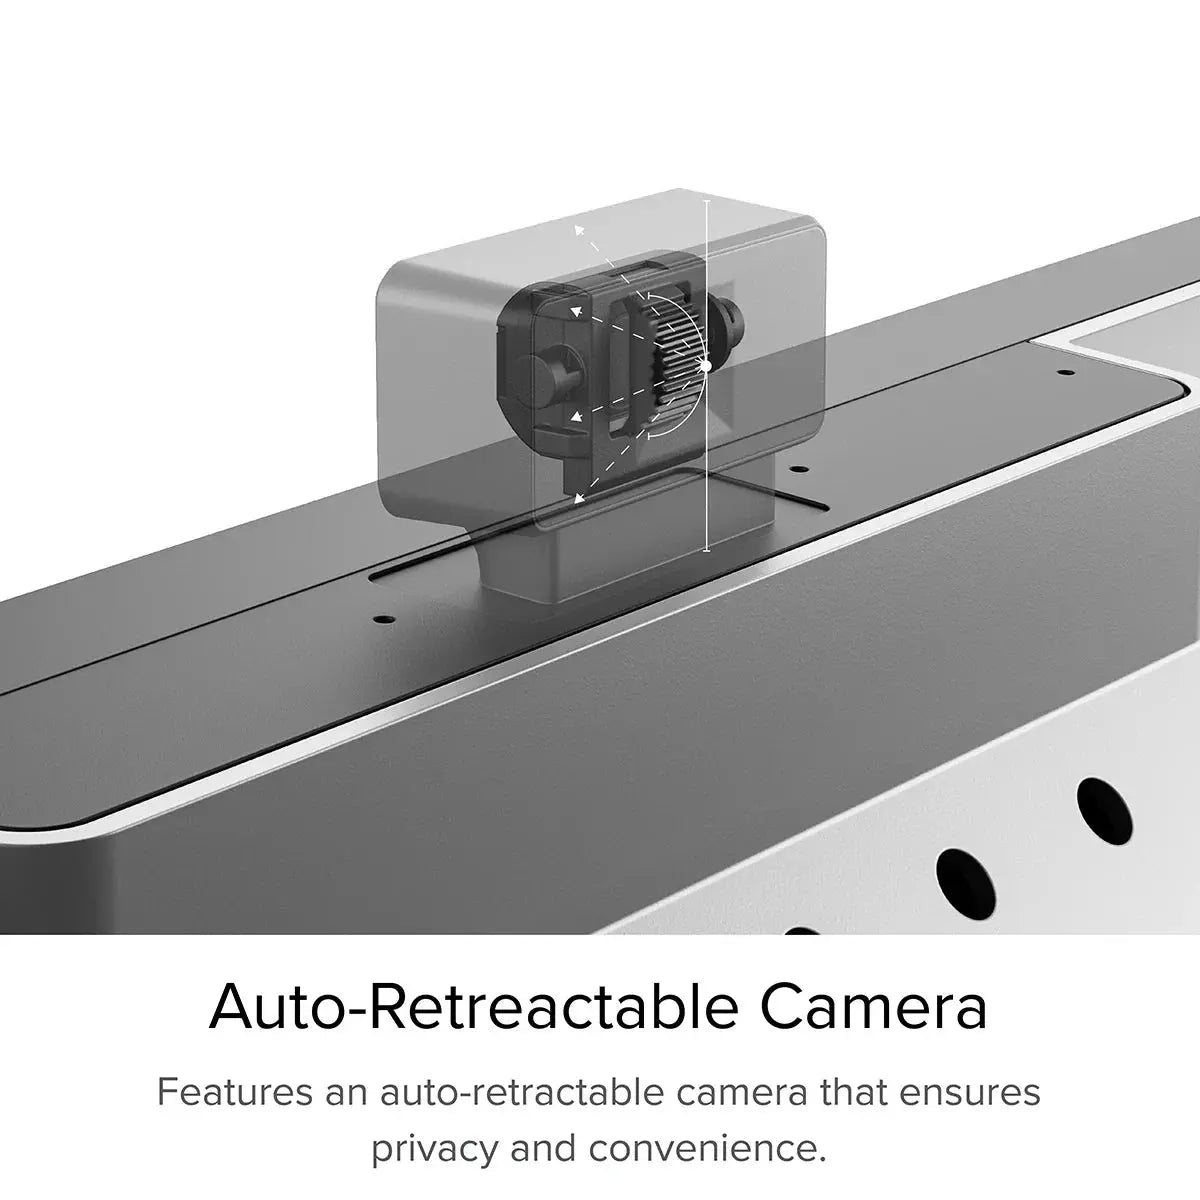
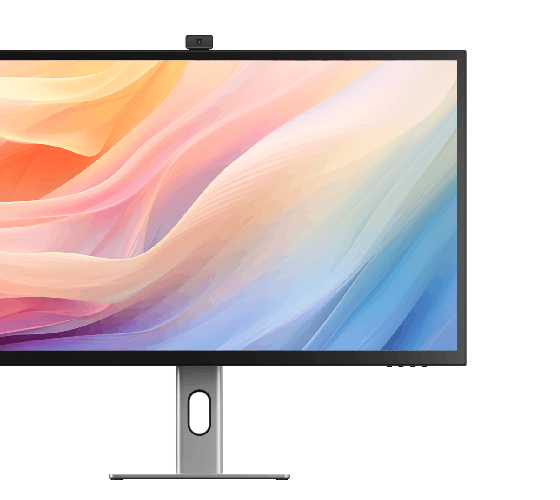
Put your best foot forward with the crystal-clear picture of Clarity Pro’s 8MP retractable webcam. Clarity Pro’s smart webcam automatically slides back into the monitor when it’s not in use, preventing anyone from spying on you without the hassle of a manual privacy switch blocking your webcam every other time you jump on a call. With Clarity Pro’s 8MP retractable webcam you’ll look stunning – but only when you want to.

The webcam’s angle is easily adjusted via its rear scroll wheel, ensuring you’re always the centre of attention. It takes just seconds to dial in your best angle with Clarity Pro’s webcam adjustment wheel – but the impression you make will last a lifetime. Say goodbye to all your laptop webcam’s awkward angles and hello to your best look.
- USB-A
- USB-B
- HDMI
- DisplayPort
- USB-C
- Audio Output

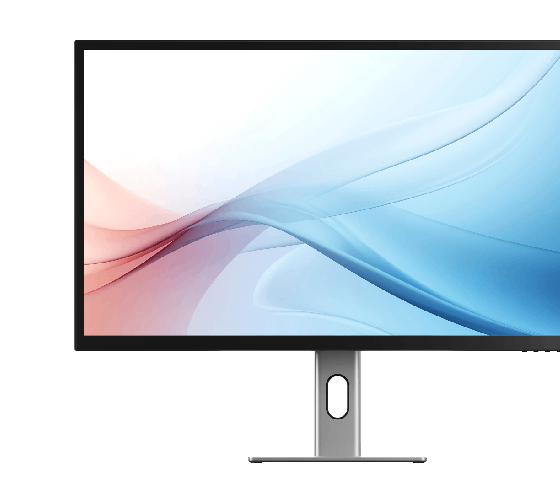
Exhibit your craft like never before with more than one billion colours across Clarity Pro’s breathtaking 27” 4K screen. Its exceptional colour gamut, vivid 350 cd/m2 brightness and sharp HDR contrasts make it a powerful tool you can stake your creative reputation on.

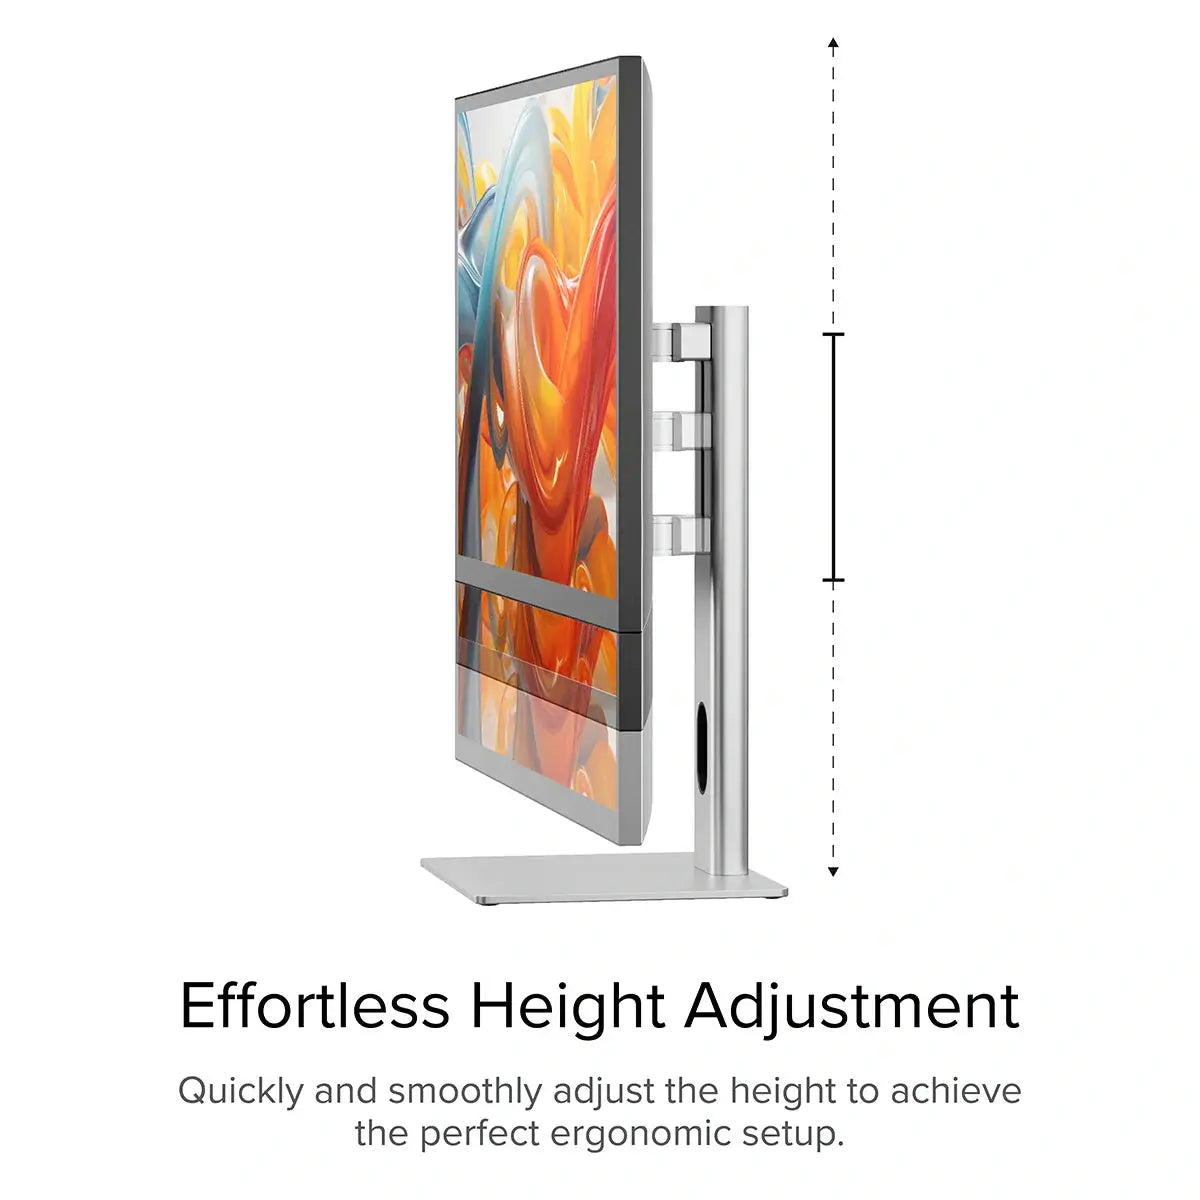
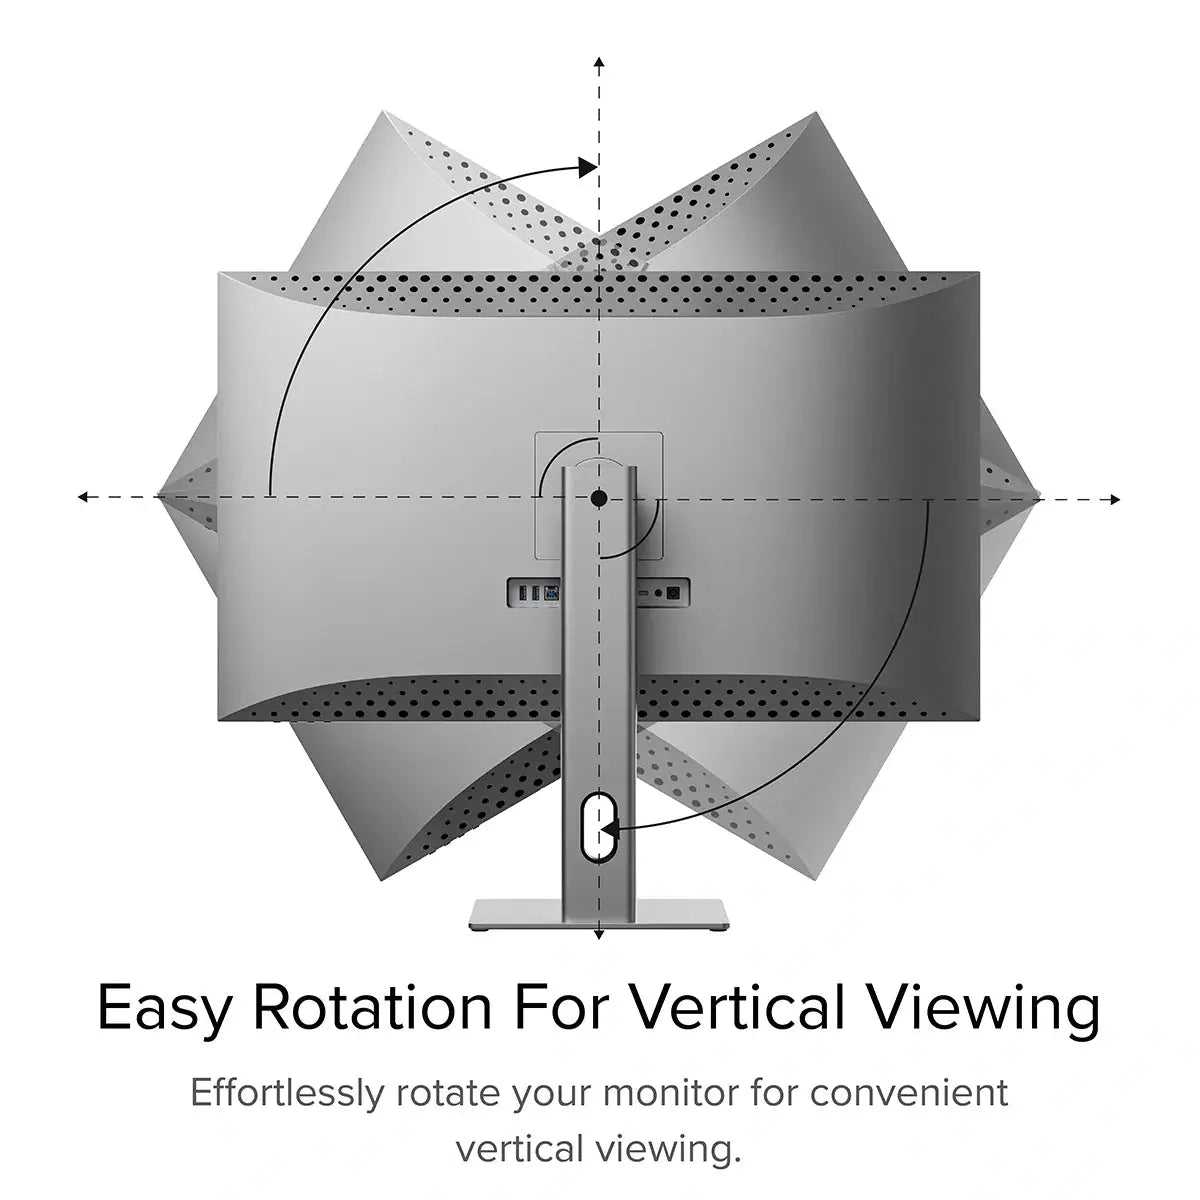
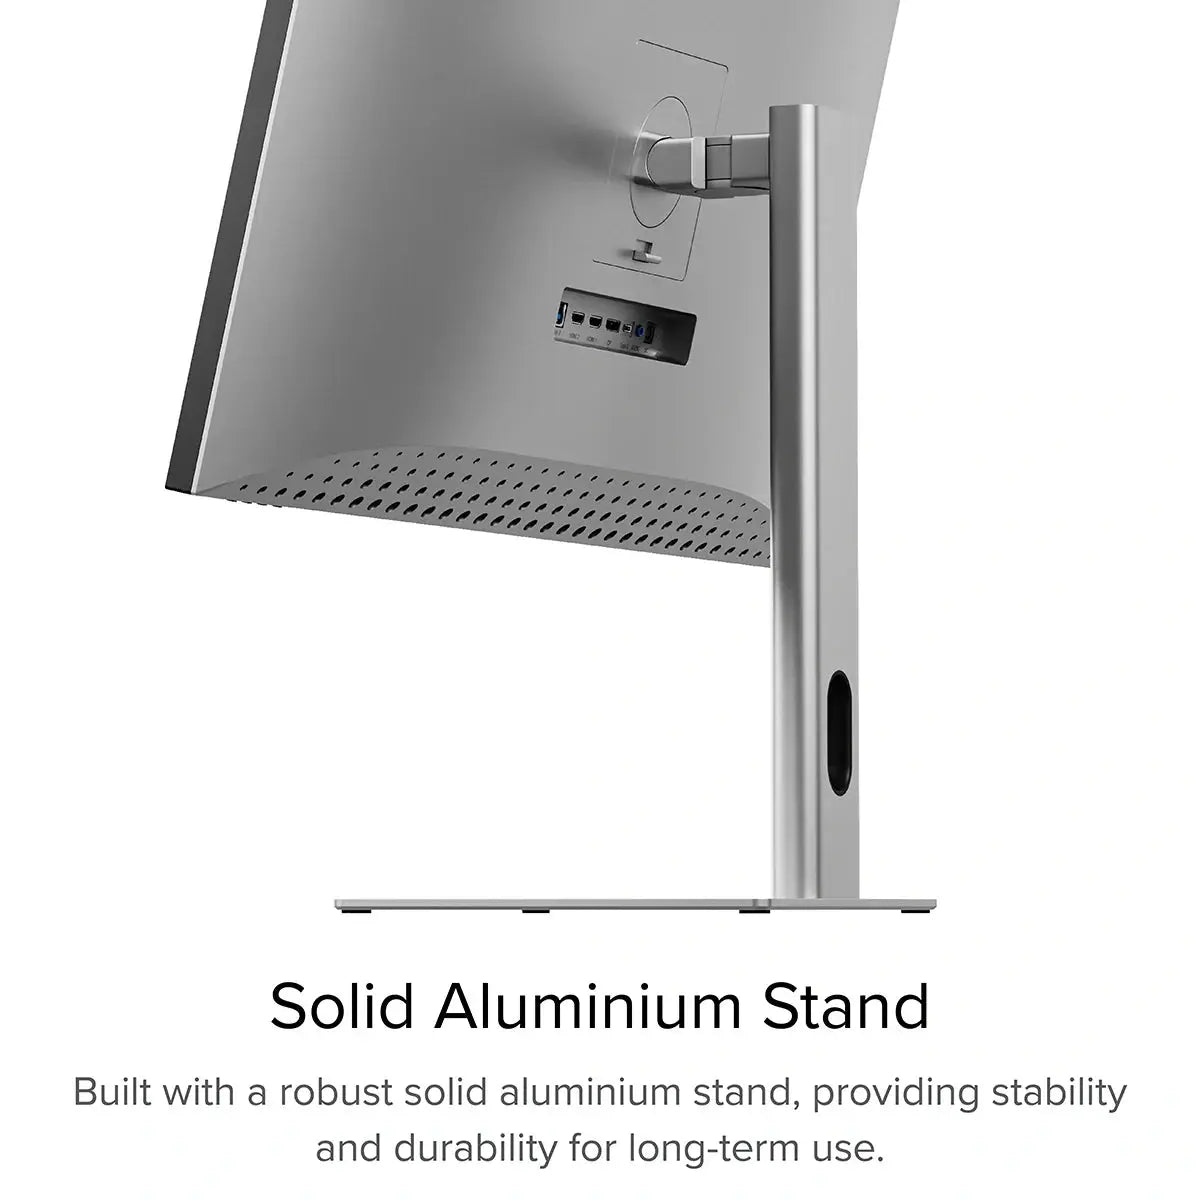
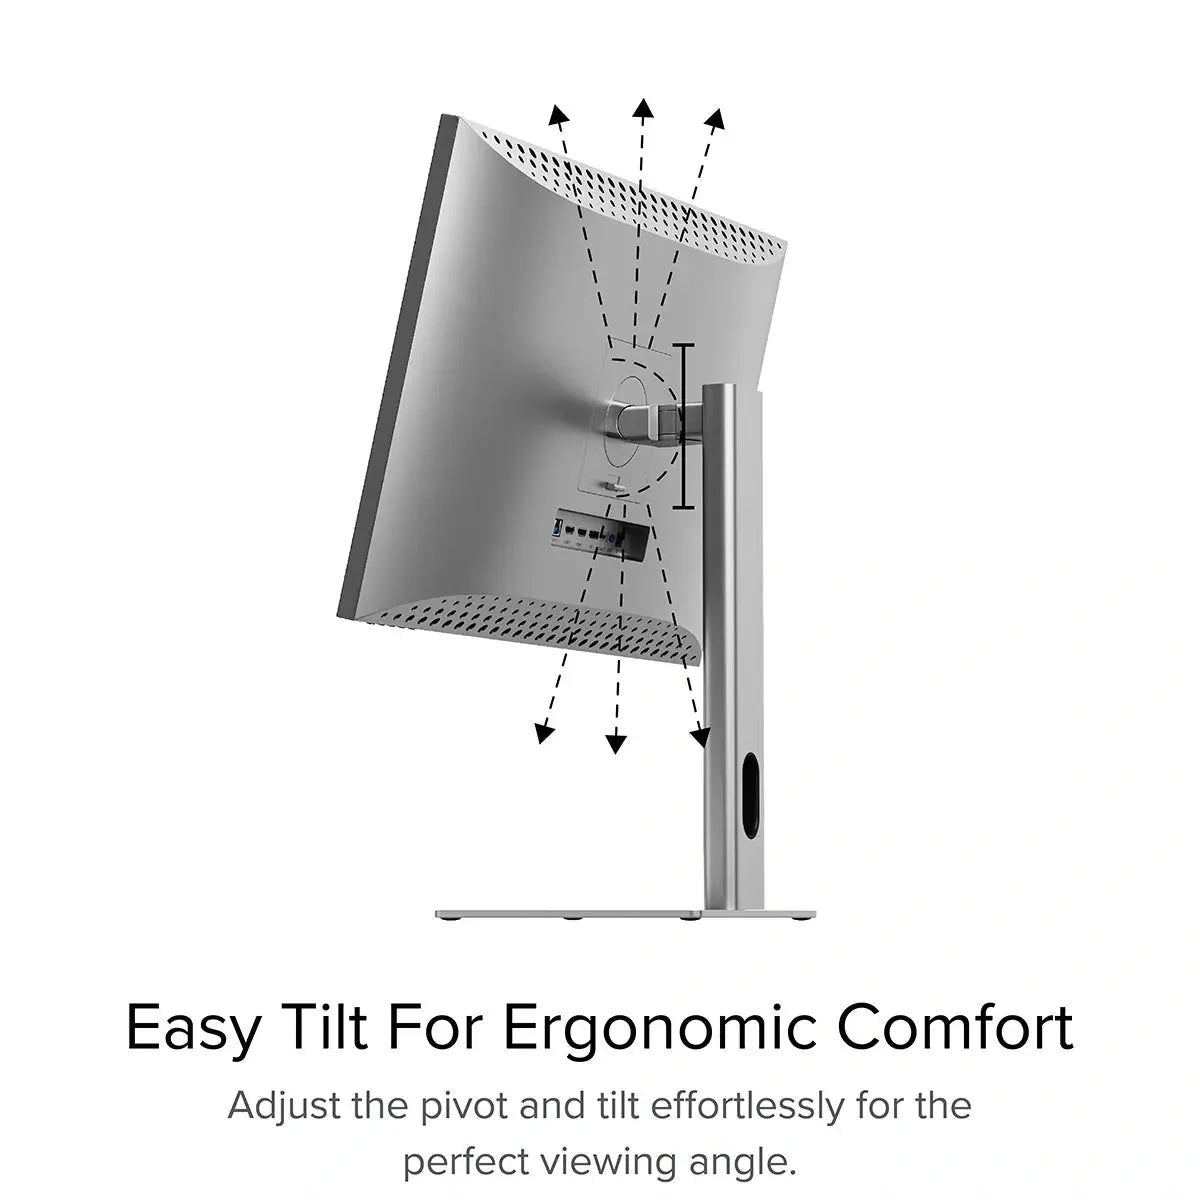
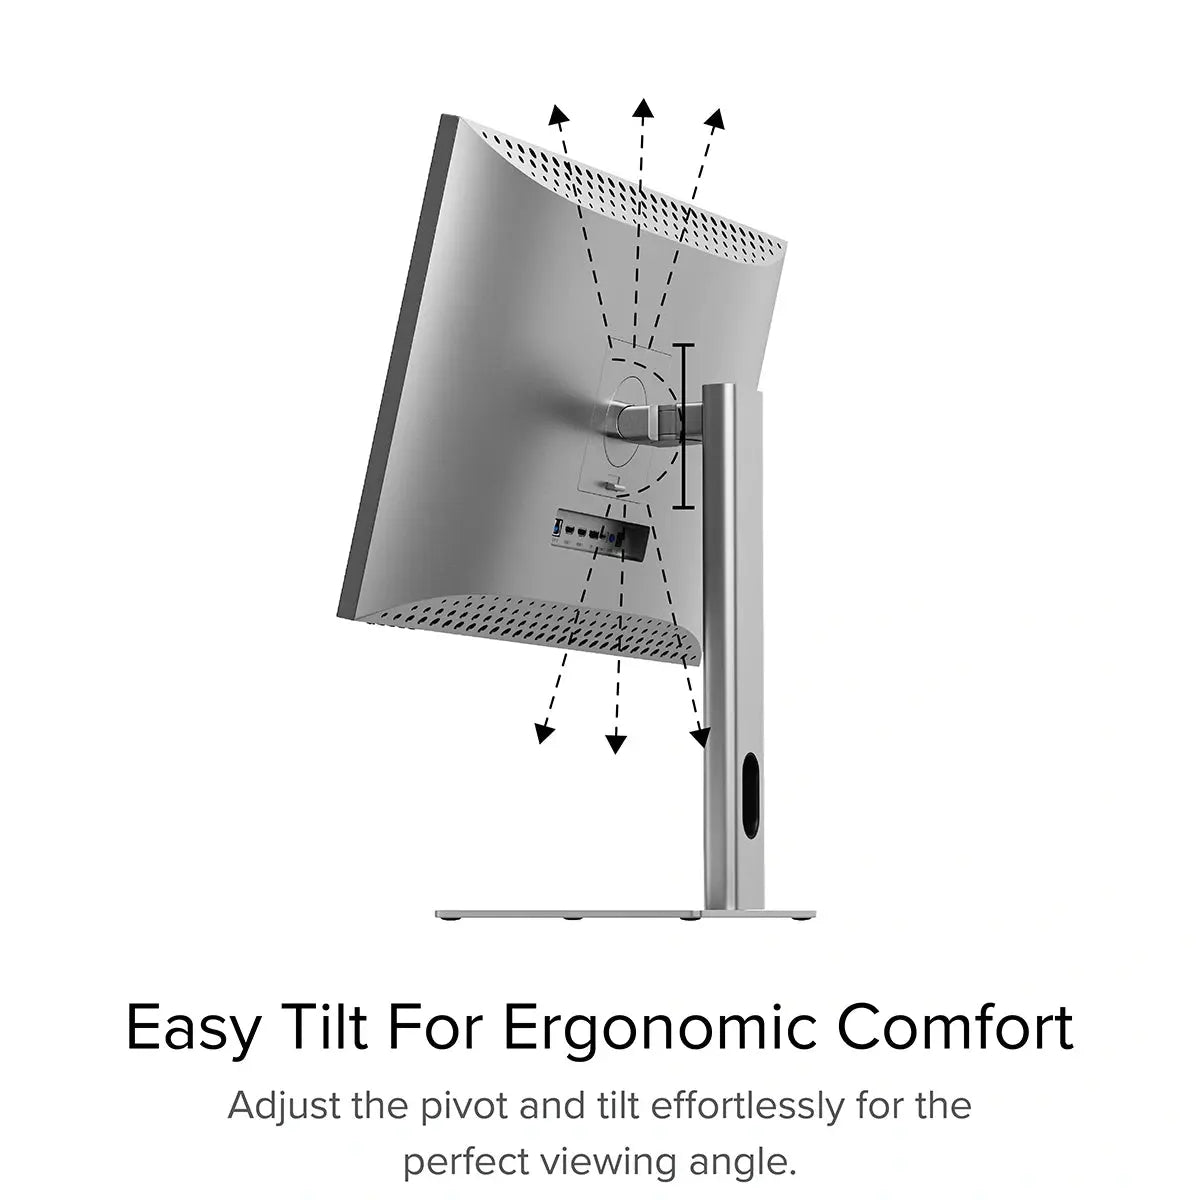
Our aluminium stand makes it easy to position Clarity Pro exactly where you need it, letting you raise, pivot, tilt and swivel the display for ergonomic comfort.


The CLARITY also features In-Plane Switching [IPS]. IPS display panel technology enables workplace teams to view the same screen from angles up to 178 degrees [almost completely sideways], without diminishing image quality.
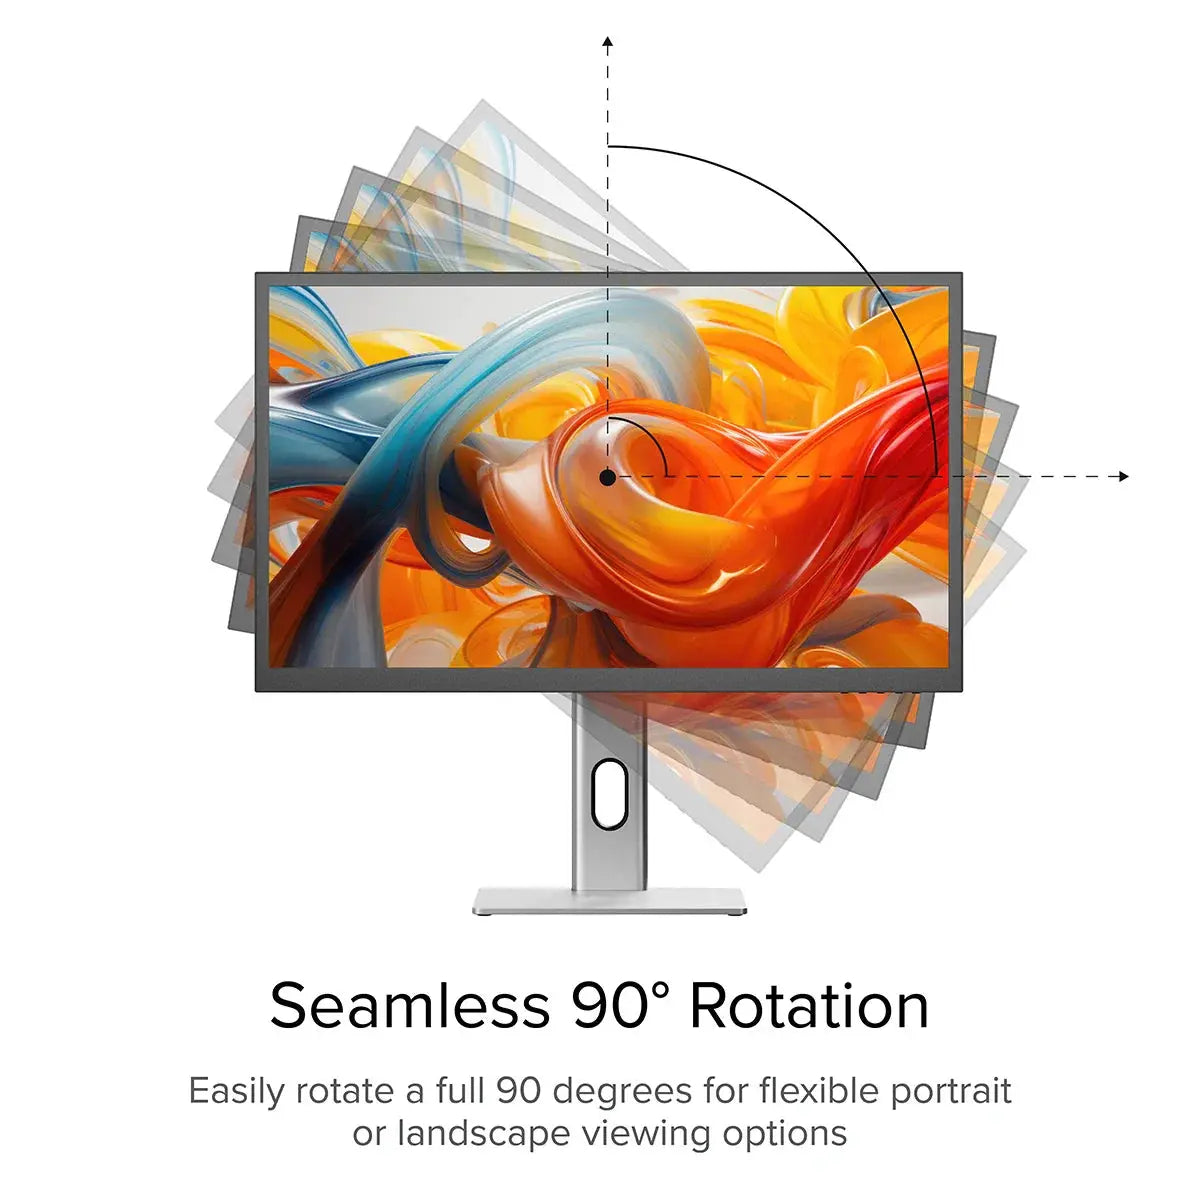
With Clarity’s smart rotation sensor, it takes just seconds to switch from landscape to portrait, perfect for editing vertical video,answering emails or monitoring a livestream. When you’re done, switching back is just as easy.

General
However, it does need to plug into a USB-C port compatible with PD (Power Delivery) on your computer.
These can sometimes be identified by the presence of a battery icon next to the port on your laptop, but often you’ll need to check the user manual or manufacturer’s website to figure out which USB-C ports support PD.
All Thunderbolt 3 and 4 ports support PD.
Connected to Clarity via either:
- 1. Clarity's USB-C port
- 2. Clarity's USB-B port
Clarity’s "Active USB" mode is set to the same USB port you've connected to your computer.
To change Clarity's "Active USB" mode, navigate to "USB Switch" in the "Other Settings" menu of Clarity's main menu.
For example: if your computer is connected to Clarity via USB-C, you would select "Type-C" in the "USB Switch" menu.
Remove the stand stem and base from their protective bags. Slot the stem onto the base and fasten via the thumb screw underneath the base.
Align the two latches at the top of the stand stem with the notches in your Clarity display, with the display still in the foam housing. Gently push the rear plate into Clarity, it will click into place.
Lift your monitor out of the foam, ensuring the display's weight remains supported.
Touchscreen
On Windows, and Mac with our Touch Screen Drivers installed, Clarity also supports most active styluses using the Microsoft Pen Protocol (MPP) 2.0 or later. This includes the ALOGIC Active Surface Stylus (ALASS).
However, Clarity Pro Touch may not take advantage of all the functions of a stylus, such as pressure sensitivity and shortcut buttons.
Moving your mouse onto Clarity before using the touchscreen usually resolves this issue.
Solution - Windows If you’re using Windows 10 or 11 with multiple displays you can specify which monitor you want touch input to apply to, which saves you having to mouse over to that display before using touch.
To do this, launch Control Panel, click “Hardware and Sound” then ‘Calibrate the screen for pen or touch input’ from the menu.

Select “Setup”, choosing “Pen Input” if you’re using an active stylus or “Touch Input” if you’re using your fingers or a capacitive stylus, then follow the onscreen instructions.

If completing this process doesn’t resolve your issue, try setting up for the other kind of input.
Yes.
To open Clarity’s On-Screen Display (OSD) menu using touch controls, swipe left with two fingers in screen’s bottom right corner. With the menu open, just use your fingers to adjust Clarity’s settings.
Troubleshooting
DP Alt Mode compatible USB-C ports are sometimes marked with a "DP" symbol, but they are often identical to regular USB-C ports. If none of your USB-C ports have symbols next to them, you'll need to consult the product manual or the manufacturer's website to find out which ports are DP Alt Mode compatible.
If your computer does not support USB-C DP Alt Mode or Thunderbolt 3/4, we recommend connecting via HDMI or DisplayPort. If your laptop does not support these, you can connect using an ALOGIC Universal Dock, which leverage DisplayLink technology to deliver video over non-DP Alt Mode USB-C connections.
To resolve the issue, restart Clarity by pressing the power button twice – it should recognize the connected device as part of its boot-up sequence.
If this issue persists, we recommend trying the following steps to isolate the issue:
- 1. Connect Clarity directly to your computer
- 2. Try connecting with a different cable or port.
- ie. Use DisplayPort instead of USB-C
- 3. Update your computer’s operating system.
1. You're connecting to Clarity with USB-C. HDR is only available when connected via HDMI or DisplayPort.
2. You're using the monitor in SRGB, Uniformity or Adobe RGB mode. Both of these video presets are designed to provide perfect colour reproduction over a limited colour gamut. HDR produces colours outside these limited gamuts and thus can't be used at the same time. You can re-enable HDR by switching back to "Standard" mode in the Professional Settings menu.
Additionally, Clarity's speakers will not function if you have an audio device connected to Clarity's rear 3.5mm audio port.
Reenable this in "Other Settings" menu to use this feature.
Ensure you connect the charging cable to a port on the laptop which supports charging.
Webcam
Then you need to ensure that's the active USB port is set to the same - either USB-C or USB-B. This can be set via the "USB-Switch" setting of the monitor's "USB Options" menu.
If these two are correct and your can't see your Clarity Pro's webcam listed in your system's available webcams (listed as either 27C4KPDW or 27C4KPDWT), restart the monitor and your computer.
If the webcam still doesn't appear, please contact ALOGIC support: support@alogic.co and we'll help you resolve your issue.
2 Then ensure that any program accessing your webcam has been closed. This can include messaging, livestreaming, audio recording and video capture applications.
3 Ensure Claritys active USB is set to the USB cable connecting your computer and Clarity, USB-C or USB-B. You can find this option in Clarity's menu by navigating to USB-Options --> USB Switch.
4 If Clarity's webcam doesn't retract after closing these programs - try reconnecting Clarity to your computer by unplugging and replugging the cord.
5 If this doesn't work, try reboot Clarity, then your computer.
6Try plugging connecting Clarity to a different computer.
7If Clarity's webcam is still stuck in the out-position, please contact our expert technical support at support@alogic.co for advice on next steps.